Here’s a nice and quick way how you can make interesting portraits of your friends and/or family (and I’d have everything shown except that I use Olympus cameras, not a Leica (but I have a Leica lens 🙂 )):
Use a Gobo to Shape Light for Portraits: Exploring Photography with Mark Wallace
BAM! A very good explanation and demo, what Mark explains here in 10 minutes took me a bit longer… 🙂
And now try it on your own friends and family. Have fun! 🙂
I have decided that this November should be my month of the kit zoom. Wanted to go a bit more to taking wide-angle photos, and although I have a very nice Panasonic Lumix 14mm/2.5 I’ll opt for the Olympus kit zoom instead which also offers other focal lengths up to 42mm – very convenient.
Of course it has maximum apertures of f/3.5 at the wide and f/5.6 at the long end, and November isn’t the brightest of all months, but I’ll see how I’ll get along. For inside, there’s always flash, right?
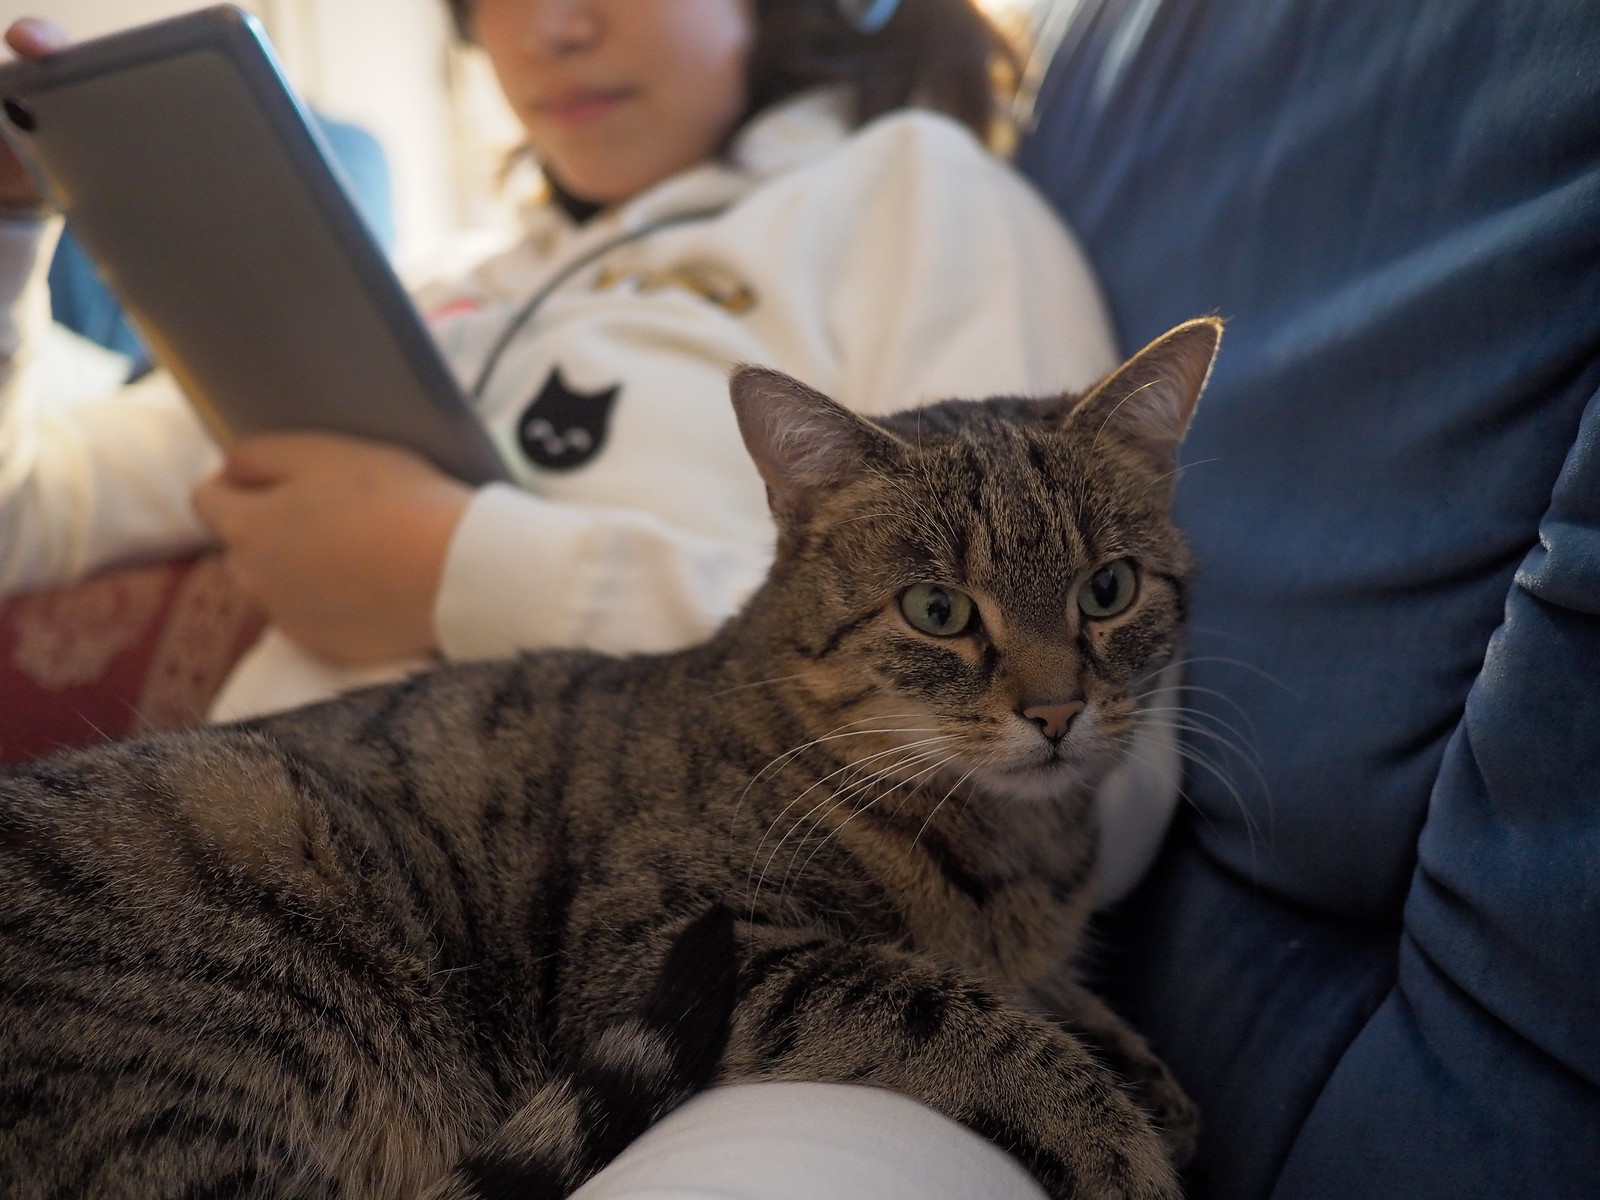
Here are some three shots (of my favourite model) using daylight only:
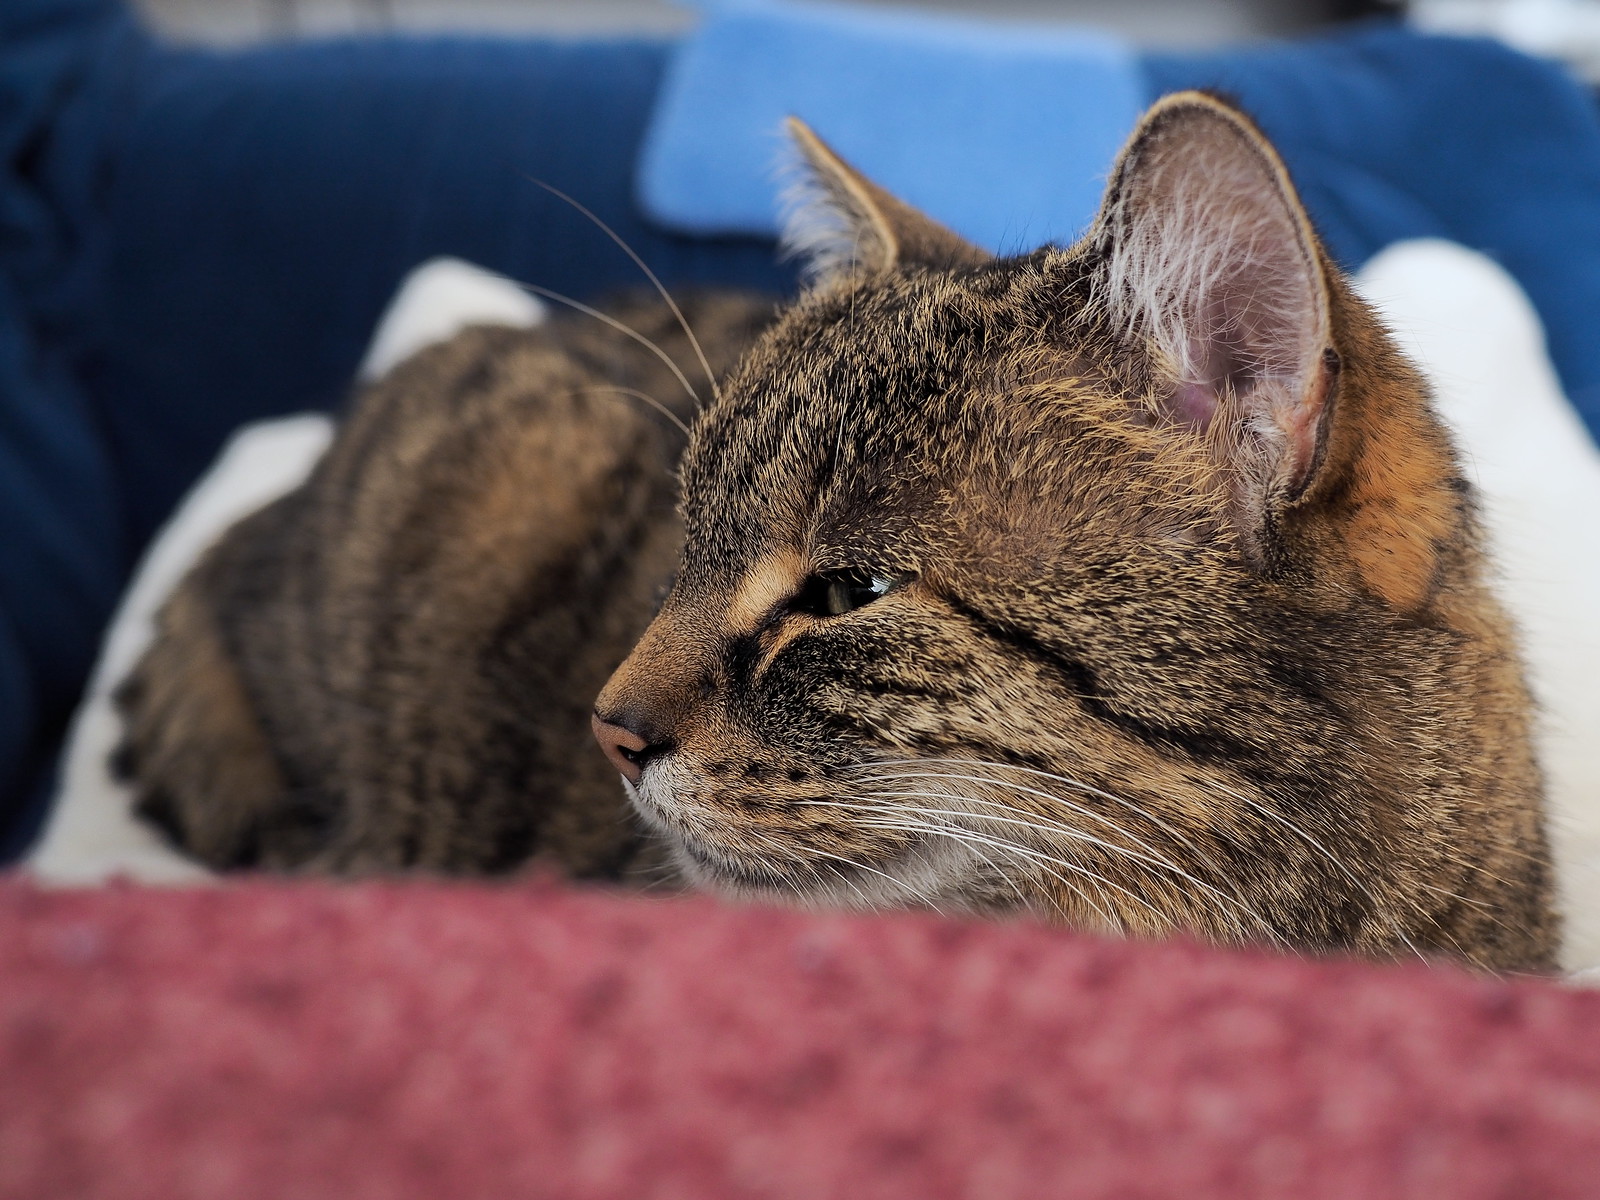
Tuna the cat, Moerfelden-Walldorf 2019
Tuna the cat, Moerfelden-Walldorf 2019
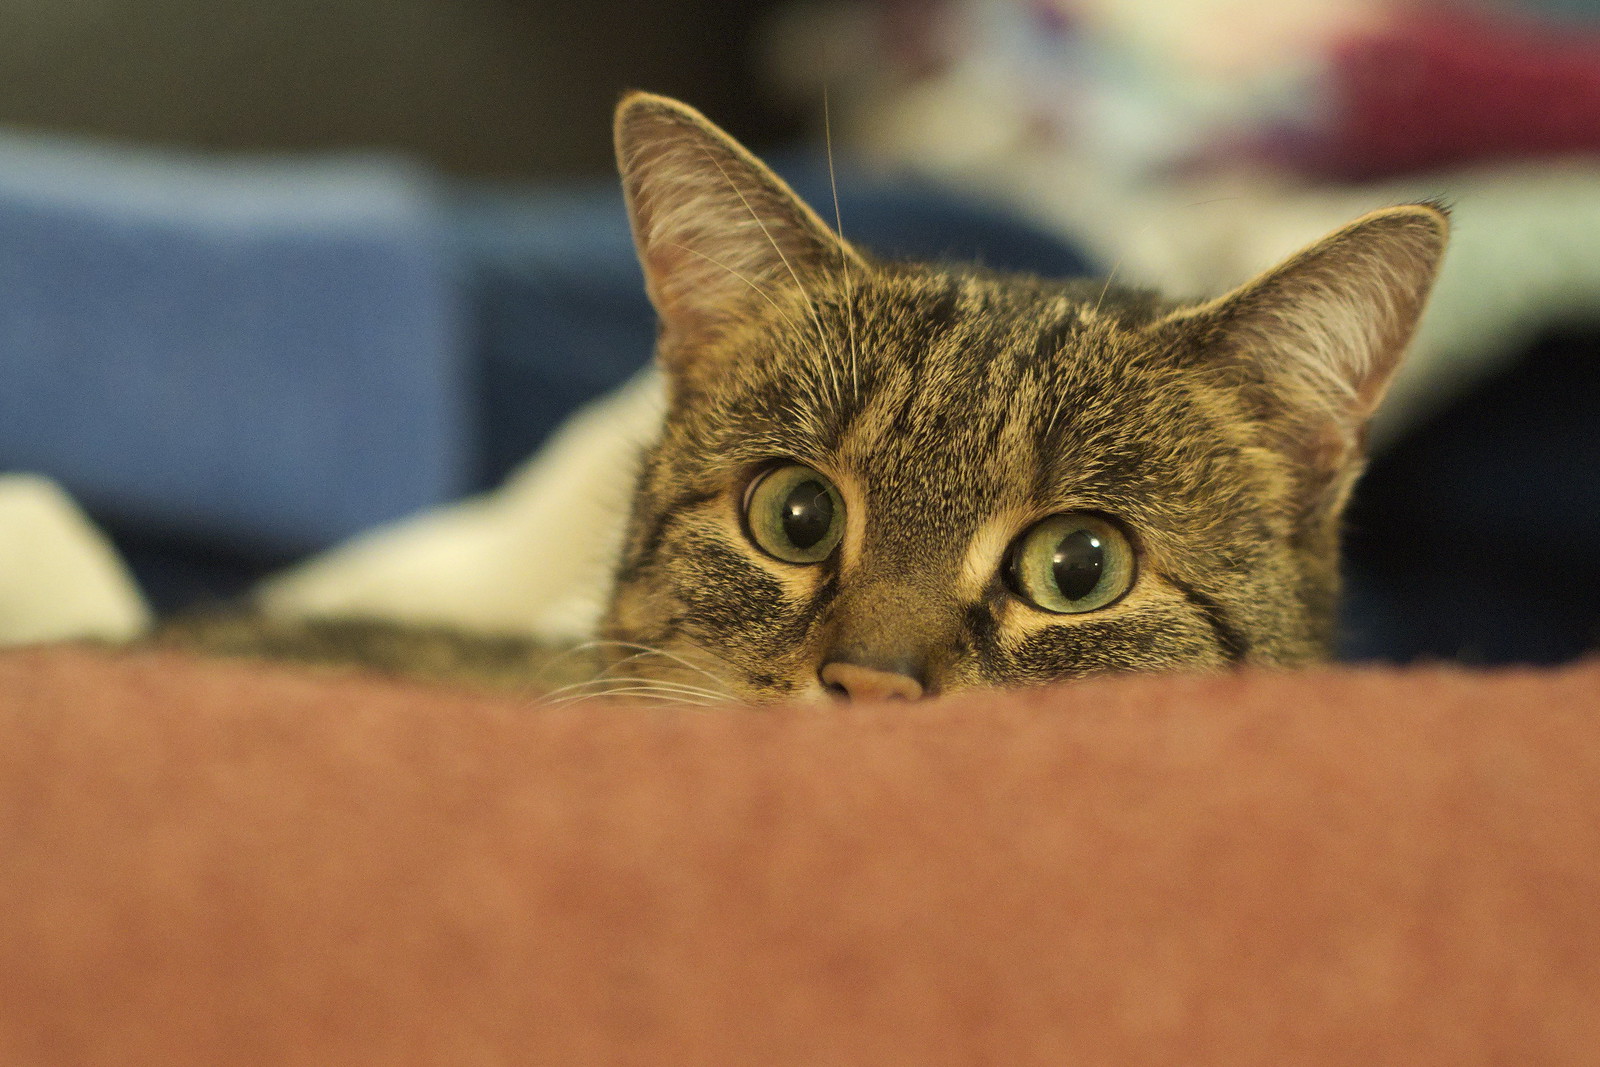
Dust, Moerfelden-Walldorf 2019
First and last one are at 14mm (which is like 28mm on film), and the middle one at 42mm (like 84mm on film).
I’ll show you more after I took any. For now and as always, thanks for viewing, and for reading.
Update, in the evening:
Here are two more photos – or in fact it’s one photo taken with two different focal lengths (of the same kit zoom lens), 14mm and 35mm:
Notice how the cup seems to be kind of ‘flatter’ in the second photo, taken with the longer focal length? And how that flower vase seems to be coming closer to the cup as well? Well, you’ve just discovered the main characteristics of tele vs. wide angle perspectives, that’s the exact reasons for using one vs. the other.
Oh, and these two photos are the jpg files straight from my camera – no post-processing whatsoever.
Oh, and like the photo in my last blog post I used RawTherapee 5.5 (and only that) on my Linux machine to make this with a simulated Kodak Portra 160VC film. Also cropped it to a 4:5 format. Took it with my E-M10 Mk2 and the 45mm/1.8 lens at f/2.
Mitchie’s new tripod head feels and operates very nice, and for the size of her camera it’s the appropriate size as well. And it has friction control and even a panoramic mode – cool.
I first saw this mentioned in a blog post and thought that it might be a nice addition, much smaller than the 40-150mm lenses we have from the Four Thirds system and which need an adapter, a bit sharper perhaps, and with a faster autofocus. Even image stabilized though we don’t need that on our Olympus cameras which have the stabilization built right into their bodies already. So I had put it onto my wishlist at some big store, not further thinking about it – and what a nice surprise when all of a sudden I had it!
It comes with a lens hood which is reversed on the lens in the picture above (take that, Olympus!), and it is indeed nice & sharp at all of its focal lengths which compare to a (much bigger) 70-200mm lens on a 24x36mm film camera. I used it on last week’s photo of Tuna the cat already:
Tuna the cat, Moerfelden-Walldorf 2019
But this photo is heavily processed with its “in-body” (added by OV3) pin hole art filter. Still, this somehow also replaces my 75mm/1.8 which was stolen in Paris last year.
Today I used it at the longer end and somewhere in the middle (at 64mm) on some flowers on our veranda:
Some flowers on our veranda, Moerfelden-Walldorf 2019
So with its variable aperture of f/4 to f/5.6 which closes down pretty fast when you zoom in it’s a pretty little lens for outdoors – but I also tried it indoors at 35mm already with good results:
Cool. This might come handy for the upcoming documentation project of Zuleikha’s school event, and also for the upcoming summer holidays. How great to have this; thanks a lot!
Yesterday I had some “fun” (read: work) again with Mitchie’s new computer. It started with lots of slow updates of Windows 10, about which I wrote already in my last post, and it went on after I finally got a nice new external casing for her SSD which came with the machine.
As it turned out, I had forgotten or at least not considered the fact that before installing both Windows and then Linux on her new SSD I had switched off SecureBoot in the machine’s UEFI (formerly called ‘BIOS’). Tho Ubuntu could have dealt with it as well as Windows, it just didn’t seem worth the hassle. But what I hadn’t known and considered was the fact that Lenovo was so friendly as to turn on Bitlocker encryption on the drive as well, so even with jumping through several hoops to even get that key from Microsoft, I still couldn’t get Windows to de-encrypt the whole shebang again. In the end I gave up on this – there are things to do during your lifetime which are more worth of your time than dealing with stupid stuff like this. And the fact that a commercial vendor like Microsoft has keys to your machine which they don’t even tell you about seems more than questionable to me… So I formatted that old SSD and put a FAT32 partition onto it, so that it can be used as a bigger (and much faster and more reliable) USB “stick” with 128GB.
One more positive side note about Lenovo: their support pages are first class. If you allow them, they scan your machine and install all the drivers (for Windows of course) you might need. That’s almost as good as Linux which simply installs them without even bothering you with it.
Another topic:
Mike Johnston wrote a nice short article titled “Mike’s Seven Laws of Lenses” on his site The Online Photographer. And – not for the first time – he included a photo of a lens which he seems to love, and which I even have:
Panasonic Leica Summilux 25mm/1.4 on Mike’s page
This is a nice one indeed, and well worth having should you consider a Micro Four Thirds camera (or even have one already). With my copy of that lens I took the following snapshot of Mitchie’s new machine, with the additional SSD leaning against it:
Mitchie’s new machine, with an additional SSD leaning against it, Moerfelden-Walldorf 2019
This is btw such a dark scene that I had to underexpose it in camera with -2.3EV to keep the blacks real black (pictures such as this one confuse the metering of even the best cameras, they would turn the photo into an average grey instead of mostly black). Anyway, you see her new “USB stick” (her old SSD) and its size as well. The machine with its 13.3″ screen is tiny, the drive even more so.
So that was my Saturday. My Sunday started with getting another new piano which was described in an article (in German) on Delamar – an online magazine from musicians for musicians from Darmstadt (ca. 18km from here). That virtual piano was interesting me because it’s some kind of hybrid between a sampled (=recorded), and a modeled (=computer generated) one, and because the sound sample on Delamar’s page sounded really nice (and some of its users even claimed that it’s better than the commercial modeled Pianoteq which I’ve tried (and liked) on Manjaro lately).
Of course like so many other “freebies” this piano comes as a Windows or Mac plugin only – but thanks to falkTX’s Carla the loading of an unencrypted Windows VST is no problem on Linux anymore (except of course that you’re running an additional Wine layer to emulate some Windows resources on Linux, but that’s not falkTX’s fault). So after downloading that freebie I could look at and listen to it on my Debian machine – looks like on my screenshot of it:
the freebie “NeoPiano” from Soundmagic, a Windows VST running on Linux (thanks to falkTX and his Carla plugin rack)
And yes it sounds nice tho I haven’t tried much until now. But now that Zuleikha has Mitchie’s old Core i5 notebook from Dell, she will be able to test it as well – she’s the pianist in the family, not me. 🙂
So next time Zuleikha comes up with a new composition of hers, we can compare it against the commercial xln Audio ‘Addictive Keys’ Studio Grand (a Steinway D sampled in a studio somewhere in Sweden), and the other free ones we have already like the Salamander (Yamaha C5) or the ‘Piano in 162’ (another Steinway). The files she uploaded to Wikiloops so far were all done with the commercial xln one.
And now let’s have some more coffee, and a piece of cake 🙂 As always, thanks for reading.
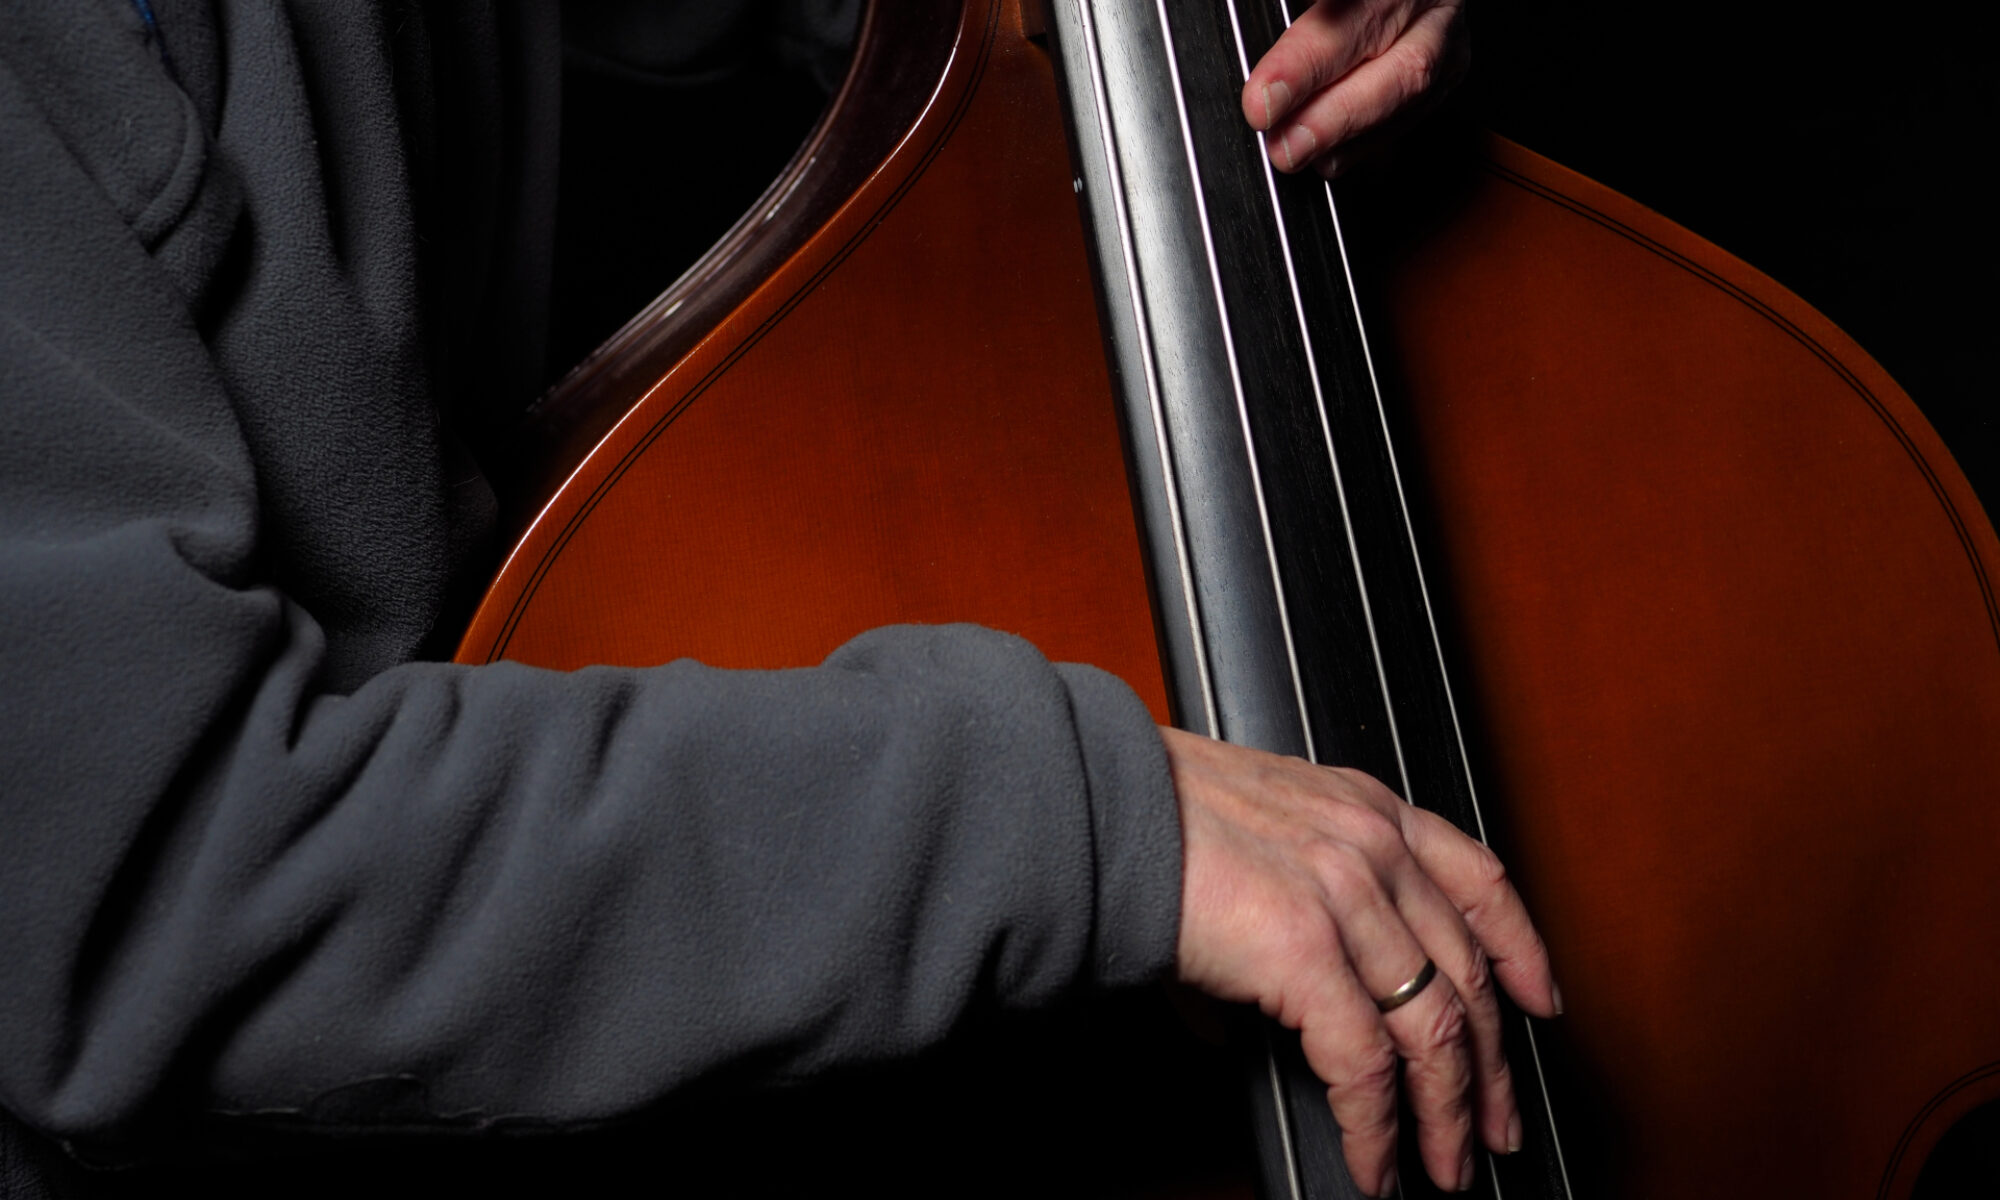
I love my old manual lenses from the film SLR cameras, like my Olympus OM-2n. I have two 50mm lenses (f/1.4 and f/1.8), and Mitchie has another 50mm/3.5 macro. Zuleikha has a fourth 50mm/1.8 on her OM-1 film camera. Plus I also have a 135mm/2.8 lens which is quite wonderful.
The difference between these lenses and more modern ones is that they are manual (no autofocus), they aren’t as “bitingly” sharp – so more forgiving for portraits which is a good thing IMO, and they’re also less contrasty and often deliver a more pleasing look when compared to the more clinical modern counterparts.
I also loved using film when we were younger, mostly Kodak Ektachrome 400 colour slides, and Ilford HP5+ black & white film. I still do that today from time to time, but time hasn’t stood still, and film and those chemicals have some costs which add up quickly. So let me show you how I sometimes use those old lenses on a modern digital camera, and then simulate those films. Here are two examples:
That is a photo of Zuleikha, taken with my 135mm/2.8 lens fully open, mounted (via adapter) to my OM-D E-M10 Mark 2 camera with ISO3200. I used an Ektachrome 400 simulation from Color Efex Pro on this one, and I will show you the differences in a moment.
Here’s another one:
Tuna the cat, Moerfelden-Walldorf 2018
That is of course Tuna the cat, taken with my OM Zuiko 50mm/1.4 lens at f/2.8, mounted (via adapter) to my Olympus OM-D E-M10 Mark 2 camera which took ISO6400 for this one. I used an Ilford HP5+ film simulation from Silver Efex Pro for this. Plus I midtoned this as usual with RawTherapee.
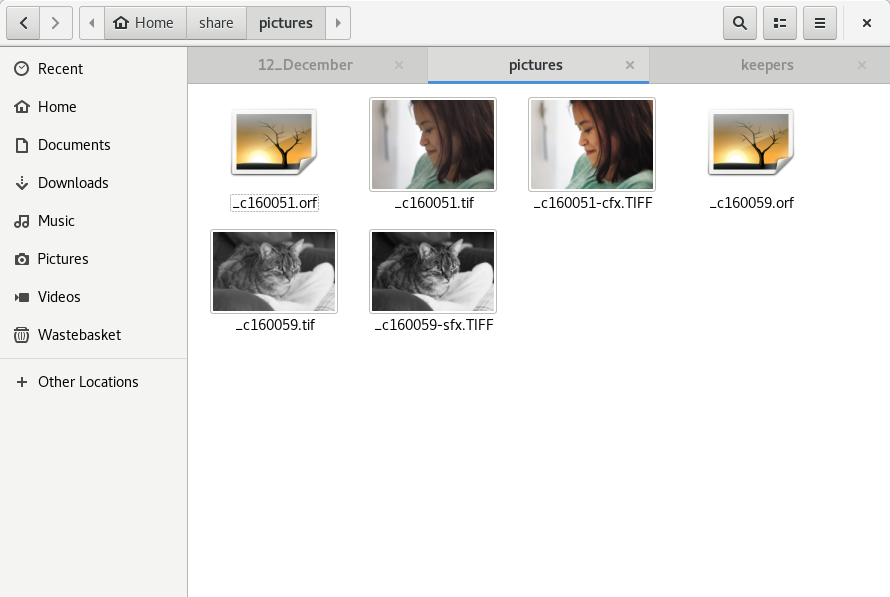
The differences to digital images? Have a look at the thumbnails in my file browser (Nautilus of the Gnome desktop):
The black & white photo preview has more contrast, tho I reduced that about 10% in SFX already. And the colour preview shows that even in those ancient times, people knew about colour science, didn’t they? That simulated film image looks a lot less dull and boring than its “digital” counterpart (and yes, of course they’re all digital, but still I hope you’ll get my point).
I should do this much more often. I love manually focusing such nice lenses, and I also love the results.
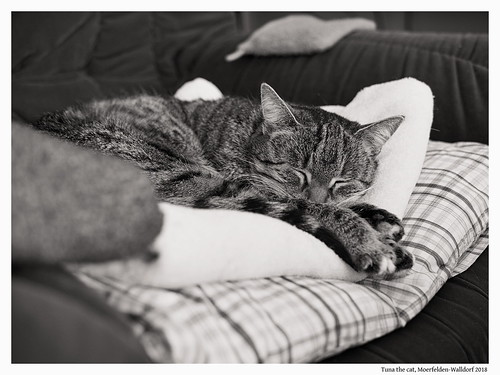
Yes, the Olympus in-camera black & white mode is great. I also love the fact that with modern cameras of the “mirrorless” category you can have a preview of the outcoming image right in your viewfinder or on the rear display, in black & white. And if you use the camera makers’ raw converter program, you *could* still have it in colour, but you *don’t have to* even see colour once in the whole process. Which I’ll describe for this photo of our cat from today:
Tuna the cat, Moerfelden-Walldorf 2018
So the first thing of course is to take a photo. For this one I used the black & white mode of my camera, and ISO 200 at an aperture of f/2 – which meant 2 seconds exposure time, and a tripod.
Then I loaded the raw .orf image into the Olympus Viewer 3 raw converter on a virtualized Windows 7 machine, but only to check exposure, sharpness and contrast, and then to convert it into a 16 bit .tif image.
This resulting .tif I loaded into Silver Efex Pro 2 (still on Windows) to use its “019 Fine Art” preset, and to create a white border (no. 14) around the image. Saved again as a .tif (Silver Efex makes this a .TIFF)
Back in Linux, I then use RawTherapee with my self-produced and saved midtoning, which leaves the blacks & whites alone but tones those mid grey levels to a brownish tone – looks much nicer than just grey. In RawTherapee I also set the title, correct some Exif error from Silver Efex, and add some keywords like “cat portrait”, or “b&w” (you can see those in Flickr).
Final step: I used The Gimp to add the image title to the white border as well – good for prints or if you’ll have the image out of context somewhere.
So this is my routine for black & white photos, which I still love since my brother Willi and me developed our own Ilford films and made “prints” with his Durst enlarger and some chemicals in our parents’ bathroom…
My brother Willi reminded me that I now have shown some photos taken *with* my new camera – but none so far *of* it.
So I borrowed Mitchie’s Olympus OM-D E-M5 Mark 2 once again to take a photo of my own one with it. Mitchie currently has the 45mm/1.8 Olympus lens on her camera, which is a small jewel in itself, and a must have for users of this system. My camera has the Panasonic Leica DG Summilux 25mm/1:1.4 mounted with which I took the latest cat photos:
Almost a month ago, my camera stopped working. The technicians from its maker said it’s an issue with the mainboard which would have to be replaced, and the cost for that including work would be ~ 160€. Considering the cost for a replacement which was 3 times that amount, I agreed upon the repair offer.
But as it turned out, they needed a part for my camera which they couldn’t get anymore. And so they came up with another offer: for that calculated repair cost they would instead send me the camera’s successor (see above, usually 3x the repair cost).
Wow. Of course I just couldn’t refuse that. And after some waiting, today my shiny new toy arrived, the Olympus OM-D E-M10 Mark 2. And of course I had to check it immediately, first with mixed daylight and artificial light:
Tuna the cat, Moerfelden-Walldorf 2018
And a bit later with two of my studio strobes:
Tuna the cat, Moerfelden-Walldorf 2018
So finally I can take photos with an own device again. Cool.
And wow, what a generous deal! Now I have to make the device mine, and set up everything like I had it before.
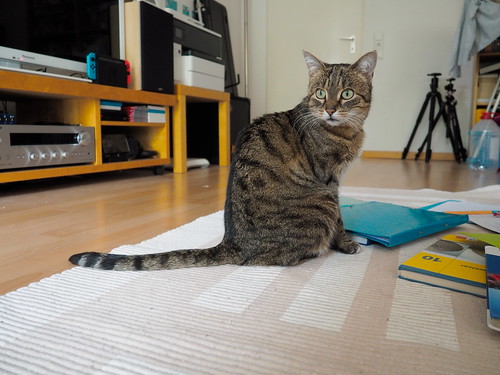
I’m still waiting for my camera, so in the mean time I used Mitchie’s again today to take another photo of the cat. Used Rawtherapee on Linux only this time to “develop” it from the raw file:
Tuna the cat, Moerfelden-Walldorf 2018
I’m writing this with the new editor in WordPress 5, new from this evening.