It’s the first of May, and the weather is still what we call “April weather” sometimes – rainy, overcast, and a bit too cold. Perfect “portrait weather”, as Michael Johnston wrote lately, and looking outside I thought that until now I’ve never made a camera profile for this kind of weather.
I’m a raw shooter. I find that raw images give me more latitude and some kind of a “safety net” for later manipulations, in case I got the white balance or some other parameters not like I intended, or like I saw the original scenes. But basically, Olympus colours and jpgs are very nice, and I like and use them a lot. I’ve set my camera to a custom profile – based on the camera’s “natural” one, but with both saturation and contrast set to “-2”. Set that way, I can later decide how to deal with the picture, and by default it gives me the widest possible dynamic range plus colours which aren’t overly saturated. That’s my starting point, and taking a photo of my ColorChecker Passport test target with these settings (and with an exposure correction of -0.7EV (2/3 stops) to avoid blown highlights), a typical out of camera picture would look like this:

Like I said, a starting point for making a profile, not much more.
My usual “workflow” (if you would call an amateur’s efforts “work”) would be like this: since I like and like to keep these famous Olympus colours, I use the Olympus Viewer 3 software (on a small virtualized Windows7 image on my Linux machine) to make a 16 bit .tif file from the original .orf. Here I apply basic exposure and/or white balance corrections, or sometimes I even decide that “-2” was too much for (or too little) saturation or contrast. Then I shut down my small Windows image again and continue using the free and open source RawTherapee raw converter to add some image descriptions, and to do the final corrections (it shows you blown channels like no other, and should the image benefit from some additional sharpening – which I rarely do these days – it also has tools far superior to these in other raw converters). With RawTherapee I make the final .jpg, ready for export to Flickr or to send for printing.
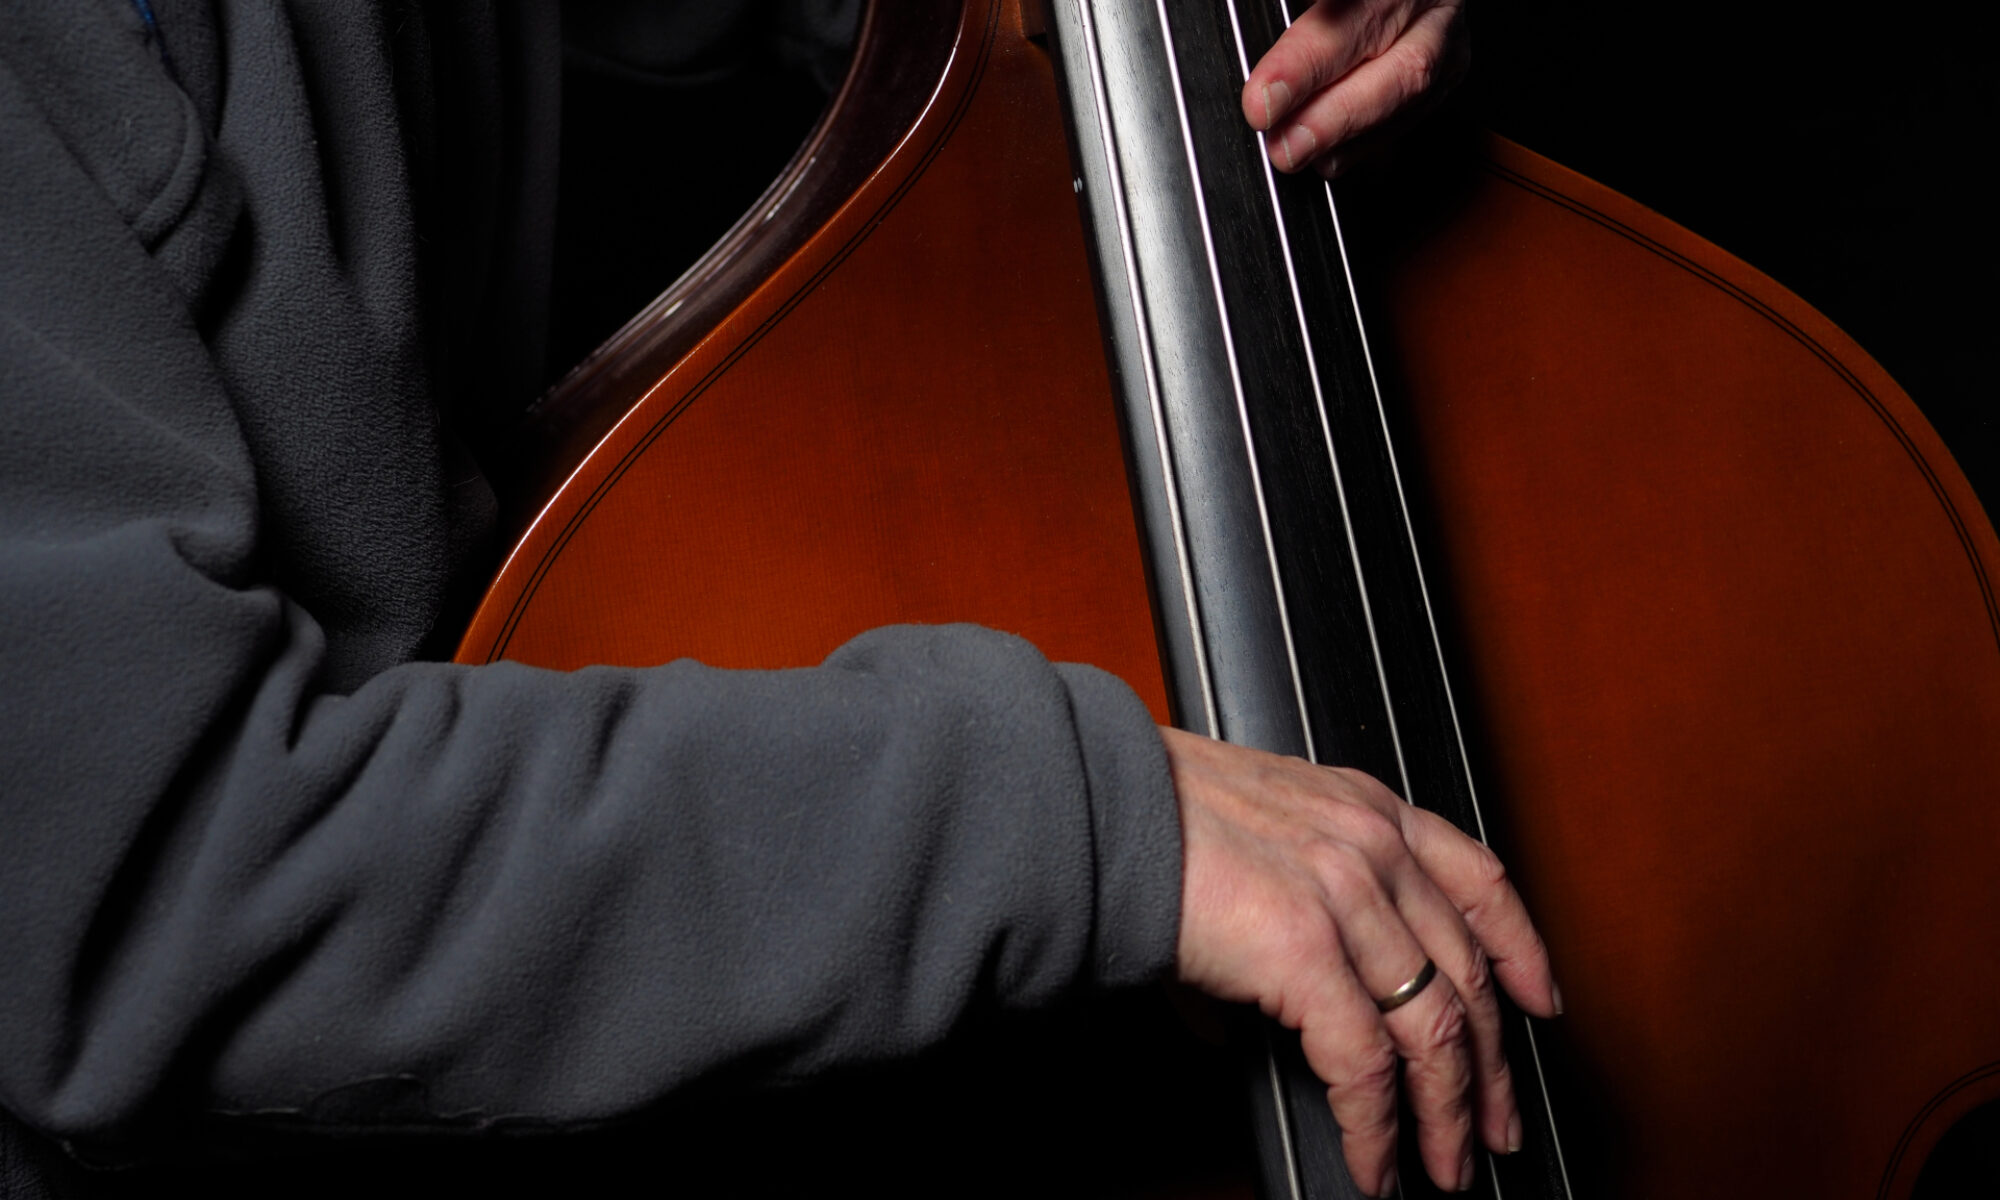
An image made with this usual workflow (which is faster than it reads here) then looks more like this:

Olympus E-PL5 and 45mm/1.8 profiling shot, out of camera .orw to .tif to .jpg (my normal workflow)
Nice enough for 99% of what I do. But like pros like Ming Thein once said: Olympus colours are nice, but not very accurate, so there might be that 1% chance that you need something profiled, even if you don’t regularly work in advertising like he does. So using some other tools, I’ve made a profile for this combination of camera, lens, and light.
To do that with the ColorChecker Passport and the software provided with it, you first have to convert your proprietary .orf raw image to the .dng format – this ColorChecker wouldn’t accept anything else. You can download a free DNG Converter from Adobe if you need to do that – and some other cameras (like the ones from Pentax and Leica if I’m informed correctly) save in that free format anyway.
Now, with the .dng file, you can make your profile – the target is usually detected automatically, but you should avoid to overblow the whites in it when shooting – or you’d have to shoot again.
That profile is then stored in a .dcp format, but RawTherapee and many other raw converters need an .icc file instead. Luckily, there’s also another converter for this.
After storing that .icc profile where all others also are (on a Linux machine, that would typically be something like /usr/share/color/icc), you can use it and make a one-click input profile like “epl5 45mm rainy overcast” or whatever you’d want to name it. And if you apply all this on the .dng image you’ve just made, you’ll get something more like this:

Olympus E-PL5 and 45mm/1.8: profiling shot “rainy, overcast” (from DNG)
Of course, converting every image to a .dng file first would be a bit cumbersome, so you can as well take the out-of-camera .orf and use that one:

Olympus E-PL5 and 45mm/1.8 profiling shot, rainy and overcast, from .orf
There are still tiny differences between these two, which might come from RawTherapee’s interpretation of white balance mostly. Where both the Olympus Viewer 3 as well as the Adobe and ColorChecker tools agree that this image (shot with automatic white balance with the option keep warm colors = “off”) had a setting of 6457K (Adobe and ColorChecker made this 6500K), and even RawTherapee thought so when using the .dng file, with the original .orf loaded into RawTherapee that software displayed some 2000K more. I don’t know which one’s correct – I’m not an expert on colour that much to understand what’s going on behind the scenes, but as you can see, both are very usable as a starting point again.
I don’t know if there’s any interest in the profiles I made, or how many of you (I don’t) expect Vogue or GQ to knock at your doors and ask you for their next cover magazine shot. If there’s any interest or demand, then let me know – I could upload that .icc or even .dcp profile for light of around 6500K here or to something like Dropbox to make it available.
Update: just uploaded the original .orf and .dng image and the profile in .dcp and .icc combined as a .zip file to my Dropbox. So if you want these, you can find them there.
Anyway: like always, thanks for reading.