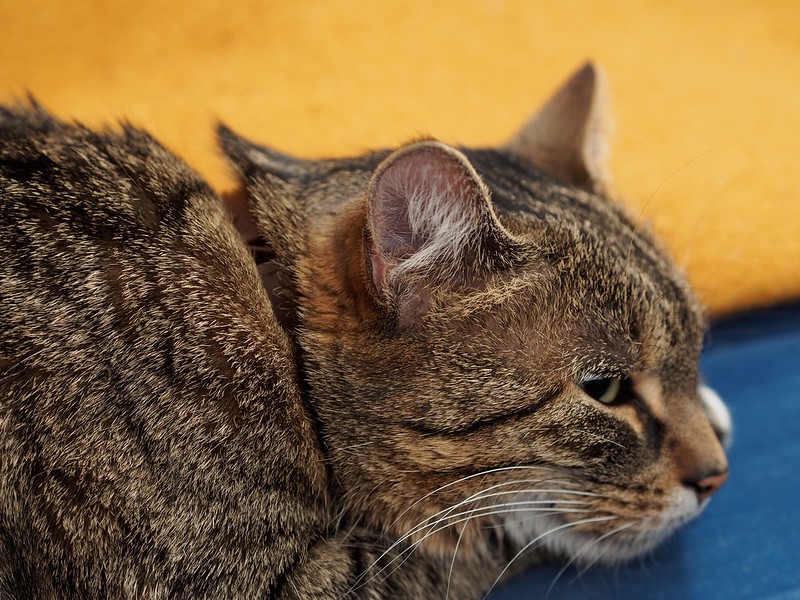
Tuna the cat, November 2014
Strobist info: Simock E300 studio strobe camera right at 1/16th power into 42″ white reflective umbrella gave me an aperture of f/2.5.
Thanks for viewing.
Music. Photography. Thoughts.
What do you do with your photos? Hang them onto walls, keep them in albums, have a few in your phones to show them around? And what do you photograph anyway, and why? Planning to sell some?
Well you can try, good luck. You can upload your photos to stock agencies if they’re good enough, but you’ll only make other people rich – not everyone is a Yuri Arcurs.
Almost 3 years ago I decided to “donate” some of my photos to the Wikimedia Foundation instead. Most if not all of my photos are CC-licensed anyway, so they’re usable on your own blogs, pages, in your articles, whatever. And tho it doesn’t bring in any money (I’m happy enough that I don’t have to monetize my hobby), some of my photos actually do get used, like the one of Mitchie’s sewing machine in an article about “Sewing machine” in the English Wikipedia.
Just uploaded this one as well:
Apfelstreusel – crumb cake with apples
It won’t win any prizes, not even on Wikimedia/Wikipedia. But maybe it’s of use to someone. And that’s still better than to be stored and forgotten on my own devices, isn’t it?
Update, from short after 4pm: just let Wikimedia check all my 3000+ photos via this tool – for which you need your Flickr ID of course (mine is 99713555@N00)
Thanks for reading.
Just bought another studio strobe, which arrived today. So of course I had to test it right away:
Tuna the cat, November 2014
I took this with the new strobe bounced over the wall and ceiling across the room, from between our bookshelf and the entrance. The flash was set to 1/4 of its maximum power output (of 300Ws), which gave me an aperture of f/2.8 on the sofa where the cat was dozing. I left the modeling light off for this one, and the photo above is as good as straight out of camera.
Here’s a photo of the new device:
N8fang Simock Mythos E300 studio strobe
For this photo taken with the same aperture and without flash, I had to use 1/1.3rd of a second (at ISO 200), and my tripod. Ok for a static object like this, but for anything which moves and breathes, I’d take the flash at 1/160th of a second instead.
In my opinion it’s the best thing you can buy to improve your indoor (and with a generator, even your outdoor) shots. You can even mix flash with daylight without any filtering tricks – just turn to strobist.com for advice on how to do that.
A studio strobe like this one is way cheaper than your typical camera makers’ TTL flash – I bought my first one together with a 36″ Octabox and a light stand for under 200€ new at N8fang, and I wrote a long-term review of it on/for the Lighting Rumors site. Just in case you’re interested, I receive nothing for recommending it.
Update, from about half past 6 in the evening:
Here’s another one of Tuna – this time with two strobes:
Tuna the studio cat
Another update, from short past 7pm:
Here’s another photo for which I used both studio strobes, and this time the PanaLeica 25mm lens. In this case, the second strobe provided some kind of room lighting for the background, which would otherwise have gone almost completely black:
Mouth piece and valve oil, again
As you can see, having more than one light can be really useful to include things like a background, or to set accents or whatever. By far the most popular use of two lights would be some kind of clamshell lighting, either from above and below or angled up to 180 degrees from each other – that is what you see in your TV series each day (usually with some more lights to simulate windows or whatever).
But even one light, even a compact flash like our sub 40€ Yongnuo YN-460II ones will really help in getting better colours, contrast, and even sharpness. Especially in the dark season which lies ahead. Much more important than what kind of camera you’re using.
Here’s an image – one last one for today – which I took using only one of these lights:
Leaf. Olympus E-520 with 50mm macro lens.
Thanks for reading.
Zuleikha was supposed to get a musical instrument from school today – but it still has to go through maintenance first, so she’ll get it on Tuesday.
She got some utensils already, and as you can probably guess, it will be a brass instrument:
Fine Wind Instruments
I cannot photograph it on Tuesday, because I’ll be off to a parents’ gathering in the evening. But maybe Zuleikha will write about it on her blog? We’ll see.
Thanks for viewing.
Found this very good video on Andrew Price’s site. It deals with composition, not only in photography (Andrew is a user of Blender) but also in video or anything else which requires a graphical output.
As he states himself, it’s much more than just the rule of thirds. So if you have a spare half hour to burn, check it out either on his site (linked above), or on Youtube. I found it via the.me, and thanks to Daniel for linking to it!
We have several old and manual (or in newspeak: “legacy”) lenses which we bought over a period of 2-3 years. The first one I bought was for my Olympus E-520 digital SLR camera, to use a lens with a wide aperture for portraits. For that one I paid 36€, and the same amount for an adapter to mount the OM lens onto an E-type camera.
Then later I found an OM Zuiko 50mm 1.4, and I paid 70€ for that one – together with my OM-2N film camera attached to it. What a bargain.
Again a little while later I found an OM-1 (as a kit with a 1.8 lens) for Zuleikha to teach her some basic photography, and an OM Zuiko Auto-Macro 50mm 3.5 lens for Mitchie. With around 120€ or so, that was the most expensive of the bunch so far.
I always had a feeling that my 1.4 lens was the best of them all for general (not macro) photography. But since this was only a feeling and no verified knowledge, today I decided to shoot the proverbial brick wall to find out.
Ok; first here’s the complete image, in this case shot with my 1.4 lens mounted onto the E-PL5 “Pen”-type camera, manually focused on the wall which was 4.1 meters away:
Brick wall
I took this same image with all mentioned lenses at all the apertures you can set them to, and to compare with a more modern lens and without an adapter, I also took the same set of images using my M.Zuiko 45mm 1.8 lens.
The center of the image is pretty good on all of them, so I’ll show some corner crops here. On this blog, they will be sized 1:2, if you want to see the 1:1 sizes, you’ll have to get them from Flickr.
First, at an aperture of f/5.6 which they all can do:
Four_lenses_corner_crops_f56
Top left: OM Zuiko 50mm 1.8
Top right: OM Zuiko 50mm 1.4
Bottom left: OM Zuiko 50mm 3.5 Auto-Macro
Bottom right: M.Zuiko 45mm 1.8
Well I don’t know what you think, but I find them all pretty good at this aperture. You wouldn’t see much of a difference when looking at the whole picture, and even these corner crops must be inspected in 1:1 size to spot any difference. There are differences alright, but keep in mind that the macro lens was just 1.3 stops down from being fully open. So when using them stopped down like here, it’s not important whether you spend 36 or several hundred Euros or Dollars.
But what about using them fully open? Well here you go:
Four_lenses_corner_crops_wide_open
Top left: OM Zuiko 50mm 1.8
Top right: OM Zuiko 50mm 1.4
Bottom left: OM Zuiko 50mm 3.5 Auto-Macro
Bottom right: M.Zuiko 45mm 1.8
Well here you *do* see differences. And you see that my feeling about these lenses was just right – for general photography (means not macro distances which only one of them could do), of our old manual lenses the 1.4 one is clearly the best. And it’s also clearly out-performed by its newer and younger 45mm sibling which is pretty astonishing even used wide open like here, and simply awesome when used from f/4 to f/8.
So the macro isn’t that good wide open? Ha! Have a look at a real-world shot which I couldn’t have made with any of the other lenses. This was on Mitchie’s camera at f/3.5, and the in-camera sharpening was dialed down one stop:
7dd_7310620_withoutNR-tunas-eye
All photos shown here except the last one are out of camera. And did I mention that I just like Olympus lenses, especially their fixed focal length ones?
Thanks for reading.
A few minutes ago I took this photo:
Fairy figurine on stage
I had something like stage lighting in mind, which I tried to set up here. On stage, actors are often illuminated by a single spot light, so this is what I took:
Fairy setup shot
This is my Yongnuo YN-460II compact flash with a Honl grid added to its front, in a position – relative to the small figure – which would resemble a spot light in theater. The flash ist set to its lowest possible power output, so I could get it close to the figure without having to stop down my lens too much, here it was 1/64th power of the flash and f/7.1 on the Olympus M.Zuiko 45mm/1.8 lens.
As you can see, the “stage” is our dining room table, but with the gridded flash at this position the light pretty much ended less than 10 centimeters behind my object – so the white wall over our wooden bench went black. No backdrops needed at all, and the room light you see was even switched on while I took the photo – with a 1/160th of a second and f/7.1 at ISO 200, that room light is gone as well, and for the setup shot with the same lens on my E-PL5 camera, I needed 1/13th of a second at f/4 and ISO 800 (about 7 stops more or so).
It’s fun playing around with these “one strobe pony” setups. And with cheap Chinese stuff used like here, it’s not even too expensive. So if you haven’t done so yet, get some of these compact flashes and start – you’ll learn tons of new tricks, and you’ll also get good colours and sharp photos of your family.
Thanks for reading.
Yesterday I took a photo of a very small animal on a grass leaf which itself wasn’t much longer than any of my fingers. For that I used my DSLR with the Olympus Zuiko Digital 50mm/2 macro lens. I even prefer that lens on my Micro Four Thirds E-PL5 camera – and here are some pictures I took with that combination this morning:
Alice band with three roses
Clay cat
Clay owl, hand-coloured
I used two flashes for taking these – one was my 300Ws studio strobe with a beauty dish above to the left and slightly behind the objects (that’s the one which threw their shadows), the other was my Yongnuo YN-460II through a 24″ square softbox from the right and slightly behind camera to fill the foreground a bit. Both fired with Yongnuo CTR-301P radio remotes, so yes, on a “Pen”-type camera you have to remove the VF-2 electronic viewfinder to be able to mount such a radio remote. But since you focus a macro lens manually using the rear display anyway, that doesn’t matter that much. For quick portraits tho, I’d prefer an OM-D camera with a built-in viewfinder.
The lens is wonderful.
Thanks for reading.