Howto: mixed light

Modern cameras have more than one setting for saving a custom white balance – my Olympus E-PL5 has two, and my OM-D E-M10 (first generation and still a marvelous camera) has four. And if you want to mix flash with ambient and warm lighting, you should make use of that.

In my cameras, I have the custom white balance 1 set to my studio strobes, and custom white balance 2 set to my Yongnuo compact flash with a Roscosun 85 (3401) CTO gel. That’s one of the companies who make colour gels for film, and they offer a cheap strobist kit for the rest of us. If you want to mix your flash with surrounding available light, one of these gels will lower the colour temperature of your flash from 5500K to 3200K which gets you into the territory of “warm” lights which are used just about everywhere.

This is how to do it with Olympus cameras:

Set up a grey or white target, and set your camera to custom white balance two (or one if you do it without using that gel). Then put the gel in front of your compact flash, and press the info button on your camera. The camera now asks you to shoot your target, so do it. If you have a small target – I use the Colorchecker Passport which fits in any camera bag – then this is best done with the 45mm/1.8 lens or with a kit zoom at its longest setting of 42mm (for Olympus cameras, yours might be longer). The target does *not* have to be in focus (in fact it’s an advantage if it isn’t), but it should fill the frame. After shooting your target like that, the camera will ask you if you want to save this custom white balance. Say yes. Done.

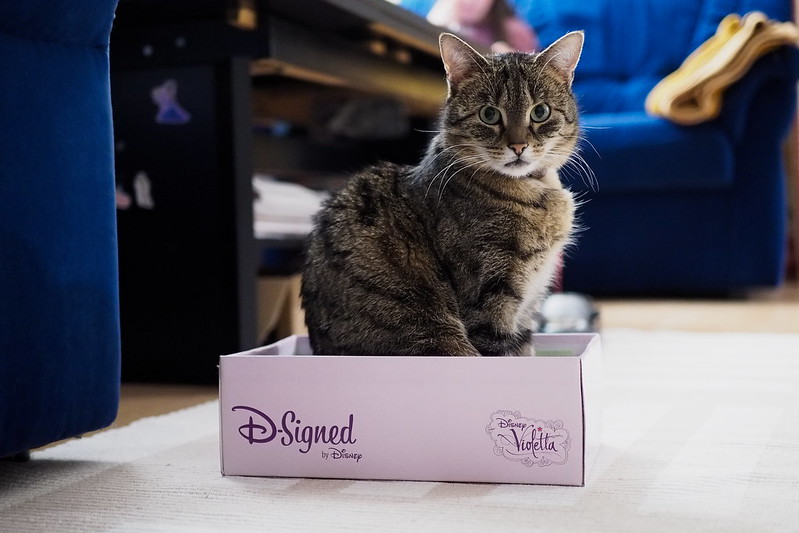
If you then take another normal test shot, still with the orange gel in front of your flash, your target should look pretty neutral, like this:

7e0_1173072-grey-target

Grey target with Roscosun 85 (3401) CTO

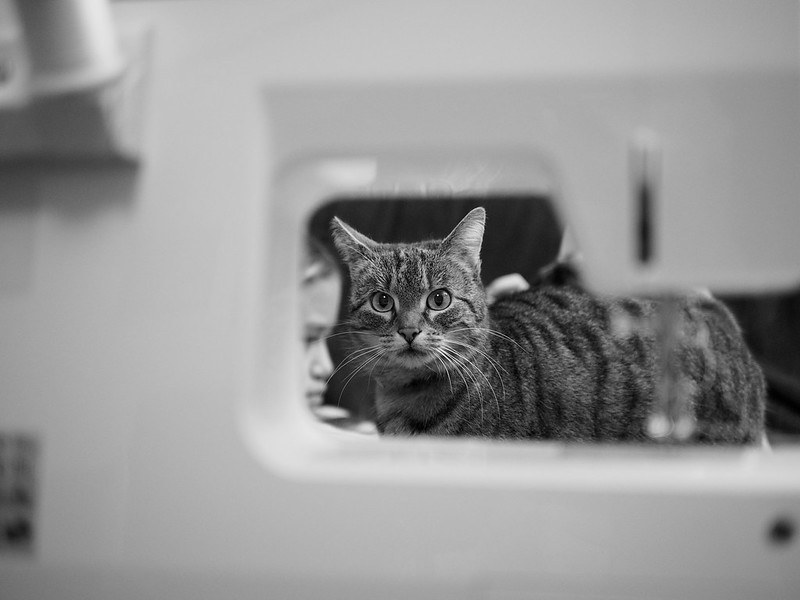
Now you can use your flash for mixed lighting, so raise your exposure time to catch some of that as well (aperture controls flash exposure, and time controls the rest). It may look like this:

7e0_1173074-mixed-light-cto

Mixed flash (CTO) and ambient (LED)

Here the bounced flash with CTO gel in front of it lit the table and chair, and the wall to the right. The background is an LED light in our kitchen, maybe 2 stops underexposed. This still has some green tint as you can see, but it’s lots better than if you used the flash without gel, and with the camera set to daylight or flash or around 5500K. If you really need precision, you can still fine-tune between both light sources, or if you *have to* nail it, then use flash for the background as well, and forget about the gels.

But this is a quick and useful technique if you’re out in the pubs or other environments, and want more or less proper colours not only for your main targets (persons for instance), but also for the background.

You can do lots more with these gels, so try them out. A ‘strobist kit’ isn’t that expensive, and can work wonders for whatever you might have in mind.

Hope that this is useful to someone.

Happy experimenting, and, as always, thanks for reading.

Cat in a box

7e0_1153054-tuna

Cat in a box

Thanks for viewing.

P.S.: this photo was just “explored” on Flickr – so thanks for each view, and for each comment and/or click on “favorite” there as well!

Trying my 25mm lens for product shots, and for portraits

I’m still thinking about Michael Johnston’s OC/OL/OY project. And my last images like Tuna through the sewing machine, or my self portrait were taken with my 25mm lens which would fit his recommendation of a “fast fifty (equivalent)”. Here are some from yesterday and from today, all using a studio strobe as the main light:

7e0_1122999-finder-scope

Finder scope

7e0_1133001-zuleikha

Zuleikha

7e0_1133009-zuleikha

Zuleikha

I was also reading about the life of Vivian Maier, whose real name probably should have been Vivian von Maier. She used a Rolleiflex medium format 6x6cm camera as soon as she could afford one, so two of my three images above are square as well. Found her story via the New York Times Lens Blog, which is required reading, or at least always interesting.

Thanks for reading my blog, as always.

Self portrait

Played around with my camera, had no idea what to “shoot”, so I took a photo of myself:

7e0_1112987-self-portrait

Self portrait, January 2016

Technical info:

I used my camera on a tripod, and let it focus onto the middle of the chair. Then I set it from “AF” to “MF” so that it wouldn’t change the focus anymore. Set the self timer to 12 seconds and pressed the button, then went around and behind the chair and looked into the camera. Oh, and this was ISO 3200 and 1/8th of a second with the lens fully open at f/1.4 – I was lit (from left to right) by a very dim kitchen light, my computer monitor, and the light you see on the right between the sofas.

Thanks for viewing.

This is beautiful

This. Be sure to watch the video. What a talented group of people.

Makes me think hard about Mike’s OC/OL/OY project.

P.S.: This is good advice as well, like always on Mike’s pages. I’d answer that with the lenses I have. So for me it’s about

50% portraits, or more. Lenses for these: 45mm/1.8 and 50mm/2 (also a macro lens)
40% other, more general photography. Lens: 25mm/1.4, and
10% a bit more wide, with my 14mm/2.5 lens.

For a two lens kit, I could live with the 45 and the 20mm/1.7 which Mitchie has. Or with the 45mm and an Olympus 17mm/1.8 .

A single lens? The 25mm one, definitely. Or the 20mm or the 17mm if you’re more into a slightly wider view.

How to find this info about yourself? Try exiftool. If you run Linux, it’s in your repository, so for Debian for example, it’s just an

sudo apt-get install exiftool

away. And on how to use it, it’s

man exiftool

You can do the math like this.

Thanks for reading.

Tante Genoveva

We were at an aunt’s place over the Christmas holidays, and after she got some prints of some photos I took at her place, she kindly allowed me to show the one portrait I took of her shortly before we left again on Zuleikha’s birthday.

She’s the only remaining sister of my late mum:

7df_c272605-genoveva

Genoveva

Thanks for reading.

Why Debian?

When colleagues or friends think about breaking out of their walled garden environments, and are asking me which Linux distribution I could recommend, my answer is always the same – I recommend what I’m using myself since over 15 years, and that is Debian GNU/Linux.

Why? Well here someone lists 7 reasons. And having been inside the community myself a bit, I know that it’s simply the best no-nonsense non-commercial and free thing out there. Nothing else comes even close, so it even runs the ISS nowadays – and pretty much the rest of the world as well.

So there you have my recommendation, plus some arguments for it. Oh, and before I forget the most compelling argument: I run Debian just because it’s fun!

The current stable release of Debian while I write this is version 8.2, better known as “Jessie”:

Jessie-1600x1200

Update from January 28th, 2016:

I’ve read and saved this one quite a while ago, but I just discovered it again. And it’s also a perfect good description of Debian and their package managing tool apt:

“It’s a 100% bug-free solution to all life’s problems, requiring no human intervention at any stage, and I especially love its rich chocolatey flavour”! – Justin B. Rye challenged with “I don’t think it is possible to over-sell APT” in a thread about how to describe Debian to new users

Thanks again for reading.

First (low light) cat portrait of this year

It’s still a bit too warm outside for this time of the year, but we are getting some rain from the West and – elsewhere – some colder air and snow from the East. Anyway, it’s cloudy and not too bright, and Tuna (our cat) is seeking the warmth wherever she can get it. Like on Mitchie’s lap, who was sitting in front of her notebook. So, lit by pretty much only that laptop, here’s a first picture of Tuna for this year:

7e0_1032952-tuna

Tuna the cat, January 2016

Thanks for viewing.