Our two kids:

Zuleikha, November 2014
Tuna The Cat aka Hanna Tuna Lonien
Photographer: Mitchie
Thanks for viewing.
Music. Photography. Thoughts.
Our two kids:
Zuleikha, November 2014
Tuna The Cat aka Hanna Tuna Lonien
Photographer: Mitchie
Thanks for viewing.
As photographers we often work with props, and also with stand-in models. In the company we have a mannequin to test lighting setups with, here at home I often ask Zuleikha for one of her figures, dolls and such. So for the following example / demonstration I used her teddy.
As photographers, we are also constantly on the lookout for good light, but if there isn’t any, or too less of it, we know that we have to make our own light. In this example, I wanted to show and share some of my thoughts about mixed lighting, using the available daylight together with some that we can create ourselves.
First thing to consider is the light temperature. Daylight has about 5600K, so if you want to mix artificial light without any heavy filtering together with daylight, you’d also take some light which is in the same colour temperature range – in this case, I used flash.
Second thought is that light actually adds up. You cannot trust your camera’s metering (which doesn’t “see” the flash before it actually happens/fires) and add light after you meter. So you have to underexpose both the ambient and also the flash light – in sum, this would give you a “right” level of exposure again.
The following shot of Teddy was available light only, but underexposed one full stop:

As you can see, that gets you in the ballpark. The outside above our sofa is still overexposed (or “blown out” as they say), but that isn’t my subject, so I didn’t care. The dark parts like on the blanket or on Teddy herself (it’s a “she”) could use some fill. This is an out-of-camera image with saturation on “-1”.
One of my studio strobes was opposite of the room, with a standard reflector mounted, and it pointed onto the wall. I switched that on and measured the light on Teddy with the strobe at its lowest power output (1/32nd of what it can blast out, so that’s about 10Ws or so). That measurement told me I should use an aperture of 1.1 – but don’t forget that this would be when the flash would be used as the only, or the dominant light source, which isn’t what I wanted. Besides, I don’t have any Noctiluxes or Voigtländer lenses which can open up that much, and I also didn’t want a paper-thin depth of field which such an aperture would give you.
So I started with using aperture 2 like in the available light shot above, but the strobe was still a bit strong and “visible” when used that way, tho it was about 2 stops under. In the end, I used an f-stop of 2.8 to get what I wanted. I also changed the angle of the camera a bit, and in post-production (with Olympus Viewer 3) I reduced the saturation to “-2”, and set the picture output setting to “Muted” (instead of “Standard” or “Neutral” which the camera was set to). I often do that when photographing humans, to get better skin colours for the 16 bit .tif image which I create with the Olympus Viewer 3, and which I further “develop” to a .jpg using RawTherapee on Linux.
The resulting image was this:

Teddy with fill flash
As you can see when comparing these two photos, even with the saturation and the picture “profile” turned down, you still get much better colours, and it simply “pops” a lot more. In Teddy’s eyes you see that small point light source which the flash actually is, even when reflected over a wall. But while that gives away that you used flash, for people it also means that you’ll get a little “sparkle” into their eyes, which often makes them look better, and somehow more “lively”.
So what’s the summary of this? If you want to mix daylight with flash or any other artificial light, underexpose both of them. When using flash as a not too obtrusive “fill” like here, the rule of thumb for this picture would be: daylight at minus one, flash at about minus three stops. Of course this mixing of lights depends on what you’re trying to do, so go on and play around to learn it.
Oh, and the 10Ws remark shows you that you actually don’t need a studio strobe for this – any external compact flash like our 40$ Yongnuos could get that level of output easily.
Thanks for reading.

Our printer, normal vs. HDR
Thanks for viewing.
This morning at work, my colleague Arno was even earlier than me. He was on early shift and came with his wife’s car:

You are not alone…
And yesterday I wrote something about taking photos using high ISO settings in the camera. I thought ok, well, Robin Wong even does that with people and/or with animals. So I had to try it:

Zuleikha, practising silently, November 2014
This is ISO 5000 which gave me 1/20th of a second at f/1.4 – together with the in-body stabilisation of Olympus’ cameras, that was just enough to hand-hold the camera to take this picture. Like yesterday, I applied a “low” noise reduction using the Olympus Viewer 3 raw converter, but otherwise there’s no post processing except a very slight rise of the luminance curve in the blackest blacks.
Good enough? Well at 100% you’ll see noise of course, but I’d say that this still would make a nice A4 print. You can look at the picture in 50% instead of 100% which would get you closer to the impression of how it would be on paper. And that would be good enough for me indeed. Again: much better than film ever was (except maybe some of the black & white films. But even Tri-X would have only ISO 400, so my exposure time would have been more than three and a half stops longer – not enough for moving and breathing subjects…).
Thanks for reading.
Robin Wong had an article on his blog lately which he called “About High ISO Shooting with Olympus“. And in his post he showed some impressive images done with ISO settings between 3200 and 6400. One commenter accused him of cheating because his photos were reduced in size, which helps suppressing noise (with reducing the overall size of a picture, the grain gets smaller and so less visible as well).
Of course Robin wouldn’t have to do that – he proved often enough with 100% crops how good these modern cameras actually are. Look at this one:

Two cups at ISO 6400
Like he wrote, it helps if you don’t underexpose. It also helps if you take a custom white balance even before you go for your final image, especially in diificult light. The light here came from our kitchen, ca. 5 meters away, from a 7 or 8 Watt power saving LED bulb. So even with ISO 6400 and with no underexposure, I had a time of about 1/8th of a second with an aperture of f/2.2.
For all those who think Robin was cheating – go ahead and download the full resolution image from Flickr if you want. If you “pixel-peep” at full size, will you see noise? Sure. But if you look at the whole image on a 24 inch monitor like mine, you’d have something like an A3 print. Noise at that magnification? Sure, it’s still there, but on paper it would be gone if you view that from a normal distance. Plus the noise is a bit like film grain, but much finer and less obtrusive than anything I ever achieved with real film in the small 24x36mm format (which they nowadays call “full frame”). It’s no comparison at all; this is much better.
Anyway – thanks to Robin who showed much better (and lots more) pictures than I have here as my quick eexample shot. But I even dared to do it with “crappy” light – and the result is still pretty good enough for my eyes.
Thanks for reading.
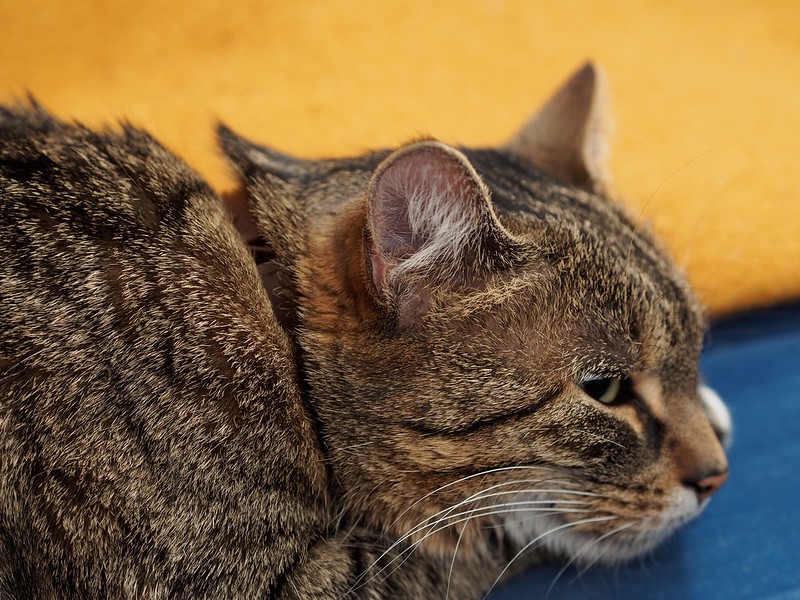
While we were getting ready to go shopping, Tuna sat down on Zuleikha’s chair. She loves places which are nice and cuddly – especially when they’re also useful as a lookout:

Tuna the cat on a high chair, November 2014
Taken with the Olympus E-PL5 camera and the Panasonic Leica DG Summilux 25mm/1.4 lens at f/2, with ISO 800. No noise reduction, as usual almost no post-processing except from adjusting the white balance, exposure, and contrast a bit.
Thanks for viewing.
Today the weather was really nice around here, so during our lunch break, my colleague Arno and me decided to take a short walk around the block. It was a bit chilly in the shadows of buildings, but as soon as we were out in the open it became really enjoyable.
There was some action at the relatively new datacenter building next to our employers’ ones, and it looks as if finally they put up some kind of logo on a wall. A big pink “Z”:

Pink “Z” 1/3

Pink “Z” 2/3

Pink “Z” 3/3
All images taken with my Olympus E-PL5 camera and the Panasonic Leica DG Summilux 25mm/1.4 lens.
Thanks for viewing.
We gave Mitchie’s VF-2 viewfinder to my brother Willi, for whom the E-PL1 is a totally new camera with it, as he said. And for Mitchie I ordered the newer VF-4 viewfinder which has a higher resolution and a bigger picture. It arrived today, and one look through it confirmed it: this is like an old Olympus OM – big, even brighter than its older film sibling, and with lots more overlaid information in the picture of course. Should be ideal to manually focus lenses for instance, but even the initial experience of looking through it confirms: this is big cinema indeed. I recently looked through a Nikon D700, and I definitely prefer the VF-4 (ok, that might be a bit unfair, because the Nikon had the 50-500mm “Bigma” lens mounted which isn’t as bright as our small primes of course).
To show you the difference, here’s a photo of both our E-PL5 cameras:

Tabletop with two cameras. (Almost) identical twins. Photo taken with Olympus E-520 and a ZD 50mm/2 Macro lens (and two studio strobes). More info about the photo is on Flickr (click on it).
Now I understand why everyone who tried it loves the E-M1. Or the E-P5 which comes with this same viewfinder. It’s compatible with “lesser” (cheaper but not necessarily worse) cameras like ours, but you might need a firmware upgrade – so in case you’re interested, don’t forget to consult the Olympus pages first.
Thanks for reading.
Got this as a present some while ago:

adidas® Victory League. Olympus E-PL5 with M.Zuiko 45mm/1.8 at f/5.6, two lights, both gridded. 1:1 raw conversion, quasi out of camera.
Thanks for viewing.
